
 Follow
- Intro
- Motion Sensor Outdoor Lighting
- Window Security Film
- Door Stoppers
- Wireless Alarm System
- My Home Defense Gun
- Final Comments
Home invasion is one of society’s foulest bowel movements. News about a victimized family leaves an impression on me similar to blindly walking into a blown up bathroom stall, and seeing a spackled toilet seat; my stomach feels ill, the stink makes me cry, and I have an overwhelming desire to kill the sick bastard guilty of the crime. The only demographic I rank below home invaders–the burglars, rapists, murderers, sadists, and monsters, who terrorize American families in their own homes–are practicing child molesters.
My passionate analogies are drawn only from an outsider’s perspective. I’ve been fortunate enough in my life to have never lost anyone to this savage act, and I’m more than happy to invest the time and money needed to ensure that the trend continues.
Accepted notion suggests that criminals are a lot like bullies on the playground. They tend to prey on the weak–the easy target–not the 200 lbs kid doing one-arm pull ups on the monkey bars. I decided that I want my house to be that 200 lbs kid that they don’t mess with…actually, I really want my house to be a seven foot tall, fire-farting lumberjack pumped on steroids, and out of his mind on angel dust, but that’s more of a long-term goal than a current realization.
With a recent investment barely cracking $800, I’ve built myself a pretty secure castle defense system. There are certainly much more expensive (and effective) home defense solutions on the market, but my wife and I created a $1000 budget for the project, and all things considered, I feel we’ve gotten our money’s worth.
Home defense is a buzzword often used among firearms enthusiasts and security industry gurus to discuss topics like ammunition penetration, night optics, and close-quarters combat. While these elements certainly make up the most potent piece of the pie–one, might I add, that I thoroughly enjoy–there’s a lot more that goes into home defense than a dead bad guy and a smoking gun–home security, another loosely defined buzzword, is one of them.
My defense strategy is layered in home security, consisting of contingency planning, motion detectors, floodlights, and alarms, rather than a brute-force-first approach. Don’t get me wrong–I unapologetically cheer when I read accounts of armed citizens putting down animals terrorizing their homes. Violence, however, is as risky as it is grizzly, and frankly, I’d rather avoid it if possible. Firearms definitely have a place in my plan, but I prefer a good night sleep over a gun fight.
If you’re like I was until recently, you’ve probably skimped on an alarm system because you sleep with a pistol next to your bed. Well, let me ask you, do you have the training and experience under your belt to claim with confidence that you could wake up out of a dead sleep in the dark and neutralize the three armed intruders at the foot of your stairs, while protecting your kids who’re currently spread out, sleeping in different rooms in the house?
If you can say yes to that, then please, let me say to you, thank you. It is a terrific honor to have an elite badass like yourself reading my blog…you and Lee Marvin were incredible in The Delta Force.
Ok, I realize that Chuck Norris isn’t the only person capable of handling the aforementioned scenario, but I can all-but-guarantee that you’re not one of the few who could…neither could I. A gun is a tool, not a security blanket, and while it’s prudent to keep one nearby, having one doesn’t give you an excuse to be ignorant about your family’s safety; it shouldn’t be your sole means of protection. Employing this simple logic, I decided to spend most of my budget on a security buffer, rather than additional firepower.
Starting from the outside and working all the way into the bedroom (giggity!), here are the meat and potatoes of my recent home defense investment.
Motion Sensor Outdoor Lighting:
I’ve actually heard a few arguments against the use of security lighting; they help show a burglar a better way in; someone who really wants to get inside isn’t going to be phased by them…ok, points noted, but there are a couple personal factors that I have to take into consideration; there are a few punk kids in my neighborhood who are afraid of being seen, and if lights keep them from screwing with a parked car in my driveway, it’s worth the investment.
I also have a good relationship with a couple watchful neighbors, and if they happen to be looking out the window and notice a ne’-er-do-well snooping around, they’re going to bring it to my attention. That said, lights are a part of my playbook.
Four wireless motion sensor outdoor lights with range covering the perimeter of my house offer the first layer of security in my home defense project. I had to think about my ultimate decision to choose wireless over a more professional, generally more powerful hardwired configuration, but after weighing the pros and cons, I made the selection pretty quickly.
Wireless lights are a piece of cake to install, and in the realm of handy work, I’m a bumbling idiot, particularly with electricity. The model I purchased came with a mounting kit, so all I needed was a power drill, a ladder, and a place to put it–obviously, no wiring required. The problem, however, with battery power is that batteries eventually need to be replaced. Aside from the $20 it will cost me to change 16 C batteries on an annual basis, it’s not really a big deal. Nonetheless, four dead lights aren’t going to do anyone any good (especially the burglar who’s depending on them to see his way in ;)), so if you don’t think you can spare the 15 minutes a year to change out the batteries, you may want to spend the time up-front on a hardwired setup.
Wireless lights, the ones in my price range anyway, also tend to be noticeably less powerful than the wired breed. They definitely light up their 25 ft range of coverage, but it’s not terribly intense. That said, I opted for LED bulbs, which emit a very clean light with an almost bluish hue. They have virtually zero glare, and even thought they aren’t particularly strong, their clear output makes it easy to see what’s lurking around outside. LED lights also last forever, so while I’ll need to keep an eye on the battery life, the bulbs themselves will probably outlast me (or at least my dog).
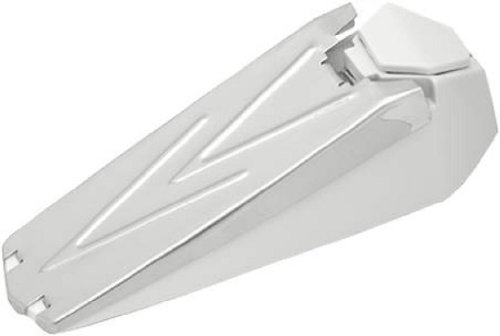
I bought the Fulcrum-made units off of Amazon for about $30 each. Their body is solid, all weather resistant, and built on a 100 degree swivel, so I can point these just about anywhere (except for the sun, as advised by the manual…). I’ve placed mine rather inconspicuously under eves, on the corners and peaking out behind a tree, however, they’re pretty sharp looking; if you want to place yours more candidly, I don’t think the home owner’s association will give you any trouble.
Again, the effectiveness of motion sensor security lighting has been the root of minor dispute, however, I feel my reasons easily justify the $120 (plus batteries) I spent on them. If you’re looking for easy installation and flexible placement, I recommend going with wireless as well…so far, I’m happy with my choice.
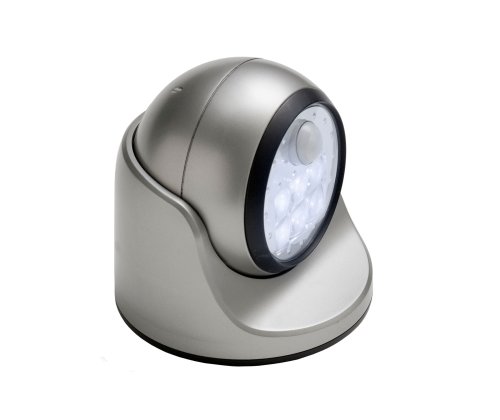 Fulcrum 20031-101 Motion Sensor LED Porch Light, SilverProvide instant security to your front portion with the ultra bright Fulcrum Motion Sensor Light.
 |
I watched a YouTube video a while back of a guy beating the crap out of a store window with a baseball bat; he gave it heck for nearly two minutes before he finally broke through. The storefront was protected with window security film, and ever since I watched that clip, I’ve wanted to mess with the stuff myself.
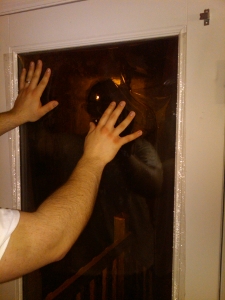
Well, as it turns out, messing with it–the installation anyway–wasn’t as fun as I’d hoped, however, I’m still pretty excited about the final product. I re-enforced my back door, which is essentially a dead-bolted window, with clear 12 mil-thick security film. Despite having motion sensor lights, an alarm system and a door stopper in place (which I’ll get to in a moment), an intruder could give himself a nice lead into my house by simply breaking out the man-sized window and walking right in. The two options I had within my budget were either installing a set of eyesore-provoking security bars, or a magically invisible force field of film; after a talk with my better half, the latter was decided for me.
 My folks live down on the east coast, and they installed security film on the majority of their windows to stop hurricanes from launching lethal debris through their house. They had the luxury of choosing it as an upgrade before the house was built. It’s generally easier, cheaper, and slightly more effective to add security film before the windows are installed. Unfortunately, I didn’t have that choice; I just made sure I followed the directions closely, and sealed it around the frame with a clean bead of silicone. If you’d like to see how I did it, I wrote a little how-to, which you can find here, How to Install Window Security Film.
The sample product in the previously mentioned YouTube video was no doubt professionally installed. I, however, am by no means a professional. Twelve mil film, I’m told, is a little more difficult to install than the thinner eight and four mil alternatives, but this stuff needs to be able to hold up when I really need it–especially since I added it to a pre-existing window. As mentioned, adding the film before the window is assembled gives it a stronger constitution, as it’s built directly into the frame. That said, with the silicone seal, and the thicker gauge, I’m banking on it to act as a decent deterrent.
 12 Mil Security Window Film 60″ Wide x 1yd. Sold by the yard as one continuous roll.Security Window Film Security Window Film designed to slow or prevent entry from a burglar. If the glass is broken the film will hold the window together preventing or delaying a thief from easily entering your home. Thief’s number one asset is time and the film takes that asset away. The 12mil…
|
I won’t discuss this in tremendous detail since I already have in a previous post, but each of the four outside entrances leading into my house are also backed up with door stoppers. The door leading into the garage is re-enforced with a MasterLock brace, and the three other doors are all supplemented with GE alarm door stops. I would love to throw down some big cheddar and replace my current configuration with stronger doors, frames, and locks, but for now, I have to do it on the cheap. Fortunately, in this case, cheap is still pretty effective.
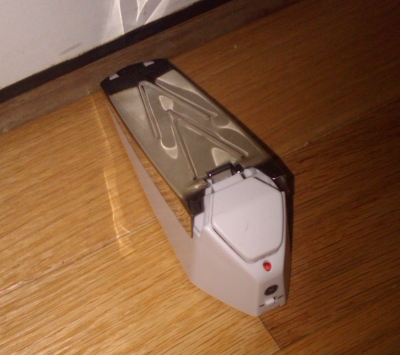 The GE alarm stoppers I picked up are one of my favorite finds since $.69 imitation Gatorade at Aldi. Like the standard rubber wedge stoppers we’ve all seen holding doors open in schools and offices, they’re made with the same basic tried-and-true design, which as it turns out, also does a fine job keeping a door closed. The feature that makes them unique from the classic design, however, is the 120 decibel alarm that squeals whenever their top surface is depressed.
They’re small enough to take anywhere (perfect for hotels), they run on a 9-volt battery, they seem to grip to just about any floor surface (carpet included), and they’re extremely cheap (less than $10/pop). The only downside to these little gems is that they require manual implementation.
I have to remember to place them under the doors every night before bed, and one of them scared the freakin’ crap out of me the other day when I came home from work and tried to open the front door, forgetting I left one in place. That said, my wife and I have already built them into the routine, and anyone else subject to habit should have no problem following suit.
 GE 50246 Smart Home Door Stop AlarmGE DOOR STOP ALARM. Pressure on door stop activates alarm. 120 decibel alarm when activated. Requires 1 9V battery (not included). Low battery indicator light. Mfg # 50246
|
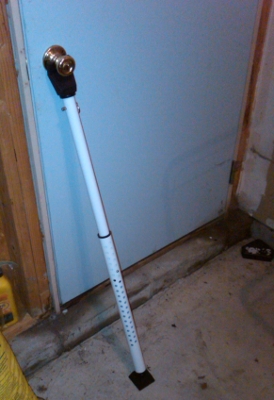
The door jammer re-enforcing the man-door in the garage was also pretty inexpensive–I think I bought it for around $20. I couldn’t use the wedged door stoppers on this entrance due to the door’s slight elevation from the floor. The brace is fully adjustable, allowing it to fit any door, as advertised (including sliding doors), so it was very easy to put into place.
The MasterLock unit I purchased is on the cheaper end of the spectrum, relative to similar products on the market. Nevertheless, it’s rated with the ability to withstand 350 lbs of direct force before it starts to buckle. Naturally, I can’t help but remember the training montage in Rocky IV when Ivan Drago throws a punch measuring 2150 PSI. This begs the question, is 350 lbs of resistance really going to make a difference?
 Heaven help me if Dolph Lundgren ever wants me dead, but the short answer is, yes. A door jammer brace certainly doesn’t make a door impossible to break through, however, it can most definitely make a difference. For one, anyone trying to gain access through forceful entry will be striking the door, which in combination with the frame and the deadbolt, will absorb a good deal the force; thus, the brace won’t be taking the entire blow directly. In addition, the Russian monster who killed Apollo Creed isn’t your run-of-the-mill intruder. Some martial arts experts can register over 600 lbs of force with a solid strike, but all things considered, the brace should buy me at least a few extra seconds, even with Kung Fu Panda storming the castle.
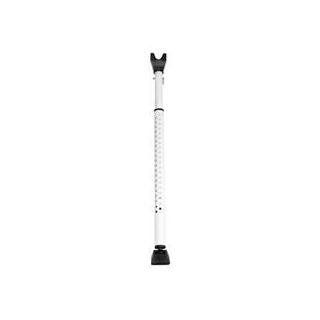 Master Lock 265DCCSEN Dual-Function Security BarAdjusts to fit most hinged and sliding doors / Top piece removable / Rugged 20 gauge steel construction / Pivoting ball joint assures contact with floor
|
I digress…moving onto the next section…
My bias for wireless technology remains evident as I move into the next section of my home defense efforts; my alarm system. A few months ago, a good friend of mine wrote a Simplisafe review, which he allowed me to publish on the site. It covers in great detail both his experience with the product, as well as his favorable reflection on its features. Reading his take on the wireless alarm system must have really resonated with me because, about a month ago, I finally picked one up for myself.
Simplisafe is the pinnacle of canned do-it-yourself home security. They’re missing a few features that I wish were available, but the system is built around a strong fundamental core (hence the “simple” moniker), which boils down to what I’m really looking for. The system is comparatively cheap, even with the optional monthly monitoring plan, plus; I own it, it’s wireless, scalable, ridiculously easy to install, and thus far, it’s proven itself to be dependable.
Costing me $400 on the nose, half the spending of my home defense budget went toward the alarm system. I’ve been meaning to get one for five years, and finally bit the bullet. Even with the door stoppers, security film, motion sensor lighting, and the fact that we’re armed and ready in the bedroom (take that however you’d like), the package isn’t near complete without a monitored security system. While I’m not exactly dropping my guard, I’ve honestly had a lot more peace of mind since I set it up.
There are times, on occasion, when I’m not home at night, and I like giving my wife the extra assurance. Moreover, there are times when no one’s home at all, and it’s nice to have someone, even if it’s just a computer with a sexy voice (the Simplisafe voiceover lady sounds hot) keeping an eye on things. Not to mention, if my family and I ever have to hunker down behind a locked bedroom door (aiming a shotgun accordingly), it will be a nice consolation to know that the cops are on their way.
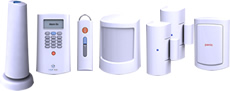
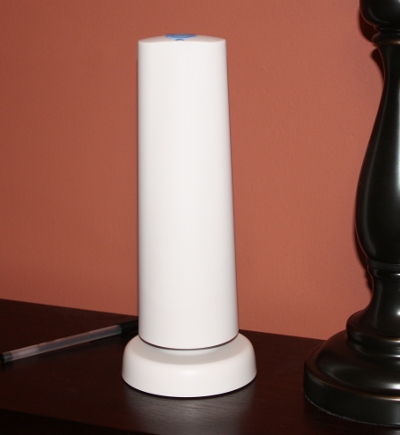 As noted, I decided to go with the wireless option through-and-through. The Simplisafe system operates off of one central hub, which is referred to as the base station. The base station is essentially the brains of the system. The sexy alarm lady’s voice also comes from the base station, letting you know when a door or window is open, as well as a handful of other naughty things. Simplisafe tends to cater to the apartment and condo dwelling crowd due to its tidy package, and simple installation and removal. However, the base station has an operating range of over 500 feet, so it has the potential to cover nearly any home or small business.
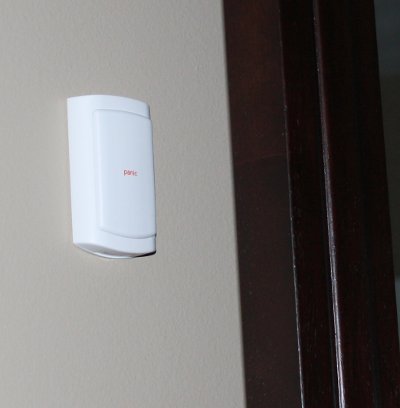
Up to 26 devices can be tagged to a single base station, including the keypad (which is included), panic buttons (which immediately send a call to the dispatcher), motion detectors, entry point sensors, and auxiliary sirens. All the devices operate off of the base station, and can be added, removed, and replaced at any time. The system doesn’t rely on power (even the base station has a six hour battery backup) or a land line for communication, so if a burglar cuts my ties to the world, security will keep on truckin’.
As implied, you choose the devices you want when you build your security package online. I chose entry sensors for all the doors and windows, a panic button in the bedroom, and motion sensors for the basement, should a skinny crackhead shimmy his way through the windows.
 I would have liked to have added motion detectors around the ground level of the house as well, supplementing the entry sensors, but my other security system–the 85 lbs lab who walks around the house at night–would be tripping false alarms left and right. Motion detectors are rated for pets under 50 lbs. They say they have tricks to work around the issue, but I decided not to screw with it for now.
Other than the wireless configuration and the low-cost monitoring service ($15/month), what attracted me to Simplisafe is the ease of installation. Seriously here, folks…if you buy a system from these guys, and can’t figure out how to install it in less than an hour, you are too stupid to live. I make no apologies for that remark because I’m convinced there has never been, nor will there ever be anyone who has trouble installing their Simplisafe system. You could probably just give it to your kids, and have them set it up for you.
It all comes in one neat little box, and, between the information on the USB drive they give you, and the manual, it’s busting at the seams with documentation…they give like 19 examples for installing each device, with pictures and animations included. All devices–even the keypad–is applied with 3M sticky tape, which if you screw up, can be reapplied by following more simple instructions. This is do-it-your-stupid-self security…I love it.
The only thing I don’t love about it, which I implied earlier, is that a few devices are missing from the menu. I would love to see wireless security cameras, glass shatter detection, and smoke and carbon monoxide detector integration, none of which are currently available. That said, all of the aforementioned upgrades are said to be in development; the cameras are scheduled to come out this year, and after talking to one of their reps about my site, he mentioned they’re working on an alert system specifically tailored for safes. I hope to be playing with all of that fun stuff sooner than later.
All-in-all, the new wireless security system, is truly idiot proof, and therefore perfect for me. In all seriousness, I think Simplisafe has struck a nice balance between cost, ease of use, and reliability–this strokes my sweet spot nicely.
|
|
Build a Custom Security System
|
|


I love shooting, running drills, training and prepping for self-defense scenarios, but as I implied earlier in this post, I pray to God I’m never placed in a kill-or-be-killed situation, especially with my family close-by. Nevertheless, even living in a picket fence-lined neighborhood with a slew of new security buffers in place, I’d be ignorant to dismiss the possibility of a violent encounter with an intruder. Acknowledging this fact and failing to properly arm myself would only extend my ignorance.
So, what’s the best tool for the job? Well, as far as weaponry is concerned, I tend to lust after swords, knives, knuckle dusters, pipe wrenches, reamers, axes, sjamboks, shillelaghs, chains, tridents and machetes, all of which will no doubt offer a fantastic fat-burning workout during the nearing zombie invasion. However, for a situation that demands a tactical advantage, and needs to end as quickly as possible, a firearm is a must.
There are a heck of a lot of different firearms to select from for the task of home defense, but the key thing to ask yourself when picking out the right one is, which gun do I feel most comfortable betting my life on? For me, a slide (or pump) action shotgun is a no-brainer. If you’re already sold–more importantly, skilled–with another breed of firepower (i.e. a pistol or a carbine), don’t let me talk you out of your comfort zone. However, if you recognize the need to protect your home and family with a gun, but you’re not very familiar with them, I would encourage you to try a shotgun out for starters.
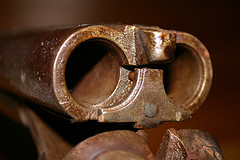
The first gun I ever shot was a 12 gauge Winchester 101. I was seven years old at the time, and while I had no appreciation for just how beautiful of a piece the 101 is (I’m gonna steal it next time I visit my parents – they don’t read this), I absolutely fell in love with its capacity for total annihilation.
I’m unsure who originated the following comparison (my guess is Massad Ayoob), but one of my favorite descriptive illustrations of a shotgun’s raw power is that the blast of a single 12 gauge 00 buckshot round causes the same amount of damage as 9 rounds from an SMG, all hitting a target simultaneously…I really need to test that claim sometime. Anyways, the bottom line is, there’s just no practical substitute for the man-stopping power of a shotgun.
 Umpf is a very important factor, but perhaps an even more weighted reason for choosing the shotgun as my primary home defense weapon is the personal familiarity it offers. I have significantly more experience shooting shotguns over pistols and rifles, and as a result of that experience, I have a pretty decent aptitude for handling one. I’ve drilled enough with a pump action shotgun that the chances of me making an operating error in the heat of the moment are significantly less than if I chose to arm myself with my AR-15. Simply put, I’m sticking to what I’m best with.
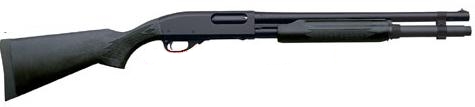
Another huge selling point pump-guns offer is that they’re relatively inexpensive. I think I mentioned in a previous post that a few years ago, I picked up a former police-issued Remington 870 at the local armory for $50. Yeh, it’s a bit banged up, but it still functions the same as it did 20 years ago. They don’t make them much more low-maintenance than slide-action shotties. If I’m still kickin’ in 60 years, that 870 will likely be as well.
While the sky’s the limit, the price for a brand new, good quality home defense shotgun generally starts at around $300. But again, there’s absolutely nothing wrong with buying used – I’m certainly not above it. In fact, the gun I’ve chosen as my primary home defense weapon is a Mossberg 500c that I bought gently used for $175.
A few home defense shotguns you may want to consider:
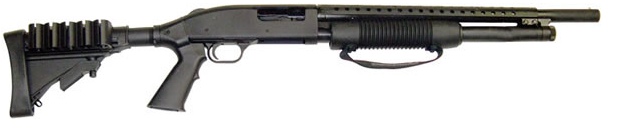
Mossberg 500 Tactical Persuader 12 Gauge, Pump Action, 18.5″ w/CAR Stock – $364.99 at Impact Guns
Remington 870 Express Synthetic 12 Gauge, Pump Action, 18″, Fixed Cylinder, 7 Round Tube – $321.00 at Impact Guns
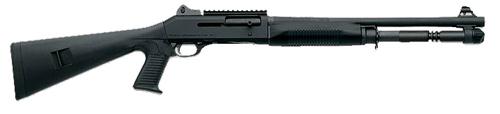
Benelli M4 12 Gauge Pistol Grip Stock, Ghost Rings, Semi-Automatic, 18.5″ – $1629 at Impact Guns
Getting good with your gun is just as critical, if not more so, than the quality and craftsmanship of the gun itself. And, of course, the best way to get good with your gun is to–you guessed it–shoot it. Fortunately, shotgun shells are also extremely inexpensive when compared to other home defense projectiles. For instance, the gun I generally carry while I’m out and about is a 40 caliber pistol. I’m hard-pressed to find a box of 50 target rounds for less than $15, and box of 20 AR-15 rounds–forget about it–$30 if you’re thrifty. Shotgun fanboys like myself can send 25 rounds of birdshot down the range for less than $6.00. The savings, for lack of a better word, starts adding up immediately.
Now even when considering the economic prowess of shotgun ammunition, I still can’t afford to shoot half as much as I’d like. Not to mention, the price of gas and my oh-so-hectic schedule makes it a hassle to get out to the range on a regular basis. When it comes to mastering your weapon, actually shooting it is king, but there are some nice supplemental activities you can do to hone your skills, regardless of the gun you own.
First off – clean it often. You should treat your gun like you treat your teeth; brush after you eat – clean after you shoot; brush if you haven’t opened your mouth in a while (aka after sleeping) – clean your gun if it’s been sitting in a closet for several months. Besides keeping it in working order and extending the life of your gun, you’ll also learn how it works in the process. I’ll occasionally field strip my guns even if I don’t intend on cleaning them; by knowing how my firearm operates, I usually know how to quickly isolate a malfunction should it arise.
When I’m not sitting around playing Forrest Gump, taking my gun apart and putting it back together again, I like to practice pulling the trigger…in my living room. To really get the feel for your gun, you have to practice dry-firing, and to minimize the risk of damaging your firing pin, you have to use snap caps. I personally prefer A-Zoom snap caps. They’re made from a single piece of heavy aluminum, matching an actual round of live ammunition almost identically. This makes them perfect for drilling misfires, jams, and, especially in the case of a pump action shotgun, practicing quick follow-up shots and rapid reloading. At first glance, they may appear to be priced a little high, but if used consistently, their value is priceless.
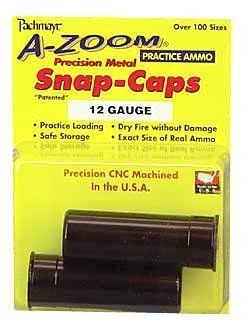 A-Zoom 12GA SHTGN METAL SNAP-CAPS 2PKPrecision Metal Snap Caps12 GaugeFor safety training, function testing or safely decocking without damaging the firing pin – Precision CNC machined from solid aluminum, then hard anodized for ultra-smooth functioning and long life
|
If you haven’t already gathered, to me, there’s no sweeter weapon on the planet than a 12 gauge shotgun. However, as I mentioned a few paragraphs back, my go-to home defense gun is a Mossberg 500c 20 gauge. First of all, I chose the Mossberg 500 model because it’s a no-nonsense, tried-and-true design, and I don’t question its ability to perform when I need it. Now, the reason I opted for the 20 gauge over my beloved 12 (a Mossberg 500A, for example) is three-fold…
A 20 gauge round packs less of a punch than a 12 gauge, however, it still provides incredibly lethal stopping power with instantaneous potential. Revisiting the gun-to-gun analogy; getting hit with a round of 20 gauge #3 buckshot delivers well-nigh the same wallop as driving two .44 magnum rounds into a target at the same time…it shoots through schools ;).
I have full confidence in the 20 gauge’s ability to foil a home invasion, and anyone who doesn’t think it hits hard enough is wrong, and probably pees with tweezers.
The second reason I’ve opted for the 20 gauge also happens to be my number one reason; my wife can shoot it. She’s not exactly Annie Oakley, but she can handle it adequately. I basically have to make her shoot a 12 gauge against her will, however, with the lighter recoil from the 20, she doesn’t mind it nearly as much. My wife will be sleeping next to the gun along with me, so it seems only logical to pick one that she’s not scared to fire.
Finally, I’ve really come to appreciate the extra spryness I get from the 20. The lighter frame (and lighter ammo) makes it slightly easier to maneuver than the 12 gauge, which may prove beneficial in a tight home defense scenario. In addition, while I’m borderline masochistic for the heavier 12 gauge recoil (I also like whiskey burn and tearing off mosquito bites), the 20 gauge naturally allows for quicker, well-aimed follow-up shots.
Drawing strictly from personal experience and observation, I’m calling the home defense effectiveness of 12 gauge and 20 gauge slide-action shotguns a wash. The potential for my wife to be a primary operator is the X factor that has landed me on the decision to go with the 20.
Here’s a great article from Massad Ayoob on the benefits of a 20 gauge shotgun if you’re sick of hearing it from me.
Even among shotgun enthusiasts, the load worthy of being dubbed “the best home defense round” is a topic rife with dispute. One thing that most gurus agree on, however, is that buckshot is generally more suitable for household application than slugs or birdshot.
Shotshells loaded with birdshot and buckshot are filled with several smaller pellets within the round. A slug, on the other hand, is a single–and might I add, nasty–piece of lead, most commonly used for long range application. Slugs are devastatingly powerful, and a true testament to the versatility of the shotgun, but they are not recommended for common home defense use. Over-penetration is almost inevitable, dramatically increasing the possibility of risk to innocent bystanders, like your family and neighbors.
Birdshot is on the other end of the spectrum. As its name entails, it’s a load designed to take down fowl, and is thus designed to make the hunt a little easier. Each round is loaded with tiny pellets–sometimes hundreds, depending on the size–which create a pattern that spreads as it travels. This makes it a lot easier to take down a flying duck 30 yards out, than if you were chasing it down with a rifle (not to mention, that would be stupid-dangerous).
Make no mistake about it, birdshot can absolutely be lethal from close range, however, its ability to penetrate soft tissue (aka – stop the intruder from killing you), loses its effectiveness very quickly. That said, in tight quarter situations, like apartments, where your neighbors may literally be behind your target, birdshot may be the ticket. One popular self-defense method is to load the first two rounds with birdshot, and fill the rest of the tube with buckshot for follow-up. The choice is honestly yours, but for what it’s worth, my Mossberg (and the 870 in the closet for that matter), is loaded with buckshot.
Buckshot is conceptually the same as birdshot in that each round is loaded with multiple pellets, but what primarily separates the two classifications is the size of the pellets themselves. In buckshot, they’re significantly larger, allowing for maximum stopping power, while significantly reducing the risk of over-penetration (relative to slugs, rifle and pistol cartridges). I’ve chosen to load up the 20 gauge with 2 ¾” #3 buckshot, which holds 20 pellets in each round. The rounds I’m currently using are Winchester Super X; I’m by no means a ballistics expert, but I’ve been using this load for a while, and I feel pretty comfortable with it. Find one you like, and go with it.
Note: buckshot is significantly more expensive than birdshot (the Super X rounds I use run me about $5.00 for a box of five after tax). While consistently training with your “defense round” is strongly encouraged, the majority of my range time is spent slinging birdshot.
Also, despite popular mythology, you can miss with a shotgun. While bird and buckshot create a pattern that expands exponentially as it travels, a shot down your hallway is going to spread minimally. There’s a slight increase in margin for error, but not enough for perfection to come without practice.
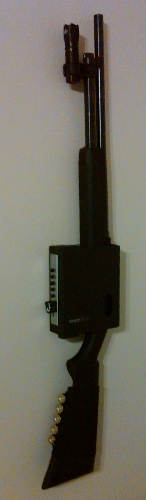
There‘s no shortage of aftermarket bells and whistles to slap onto the top, bottom, and/or side(s) of your shotgun. Some of them are great, some are garbage, and most of them simply don’t apply to what I’m looking for in this particular application. Having said that, I’ll go through a quick run-down of what I have on the Mossberg 500c hanging on my bedroom wall.
Barrel:
My barrel isn’t exactly a modification, but I’ve chosen to stick with the 18.5” smooth bore barrel that the firearm was originally sold with. This is both a very common and practical length for close range combat, allowing for tight maneuverability. For my intents and purposes, there’s no real need for a longer, rifled barrel.
Barrel Mounted Flashlight:
An often underrated aspect of defensive shotgunning, particularly within the home, is being able to identify your target. Serving also as a tactical component, casting light on the alleged assailant allows you to confirm whether the man between the cross hairs is friend or foe.
Weapon-mounted flashlight systems can get very expensive. My buddy has a Benelli M1 with a Surefire forend setup, and it’s an absolute stud in the dark. Of course, what’s essentially a $400 flashlight better be able to perform. Because I’m doing my thing on the cheap, the NEBO LED light, and the Mako barrel mount I purchased off of Amazon in a package deal, cost me less than $35 altogether. I have to admit, I thought I might be filling out some return forms when I made the purchase, however, I’m very pleased to report that I was wrong. Shortly after mounting the flashlight, I ran 50 rounds through it without any hiccups. Other than a slight rotation, the light stayed in place and didn’t miss a beat.
Buttstock Shell Holder:
I also picked up a nylon buttstock shell holder for less than $5.00. This cheap, but effective little piece of gun clothing gives puts an extra five rounds by my cheek for quick reloading. Whether it’s a buttstock holder, a receiver-mounted side saddle, or a Speedfeed stock, an add-on that bumps up your ammo capacity is as much of a “must-have” as any other aftermarket mod I can think of.
Magazine Tube Extension:
Unfortunately, a magazine tube extension can’t be practically added to the Mossberg 500c that I own. While an extra three shots would certainly be lovely, any situation that can’t be ended with 10 rounds of buckshot (five in the tube – five in the shell holder), probably wouldn’t end with 13 either…just sayin’.
Standard Stock:
I have a pistol grip for the Mossberg; it’s easy to install, it looks cool, and it’s fun to switch it up every now and then. And while the pistol grip adds a little extra wiggle room, I personally feel much more comfortable with the standard buttstock, thus it’s a part of my go-to configuration. Not to mention, without it, I couldn’t use the shell holder. Again, you’ll just have to try both and see which one works best for you.
 Allen Company Buttstock Shotgun Shell HolderAllen Shotgun Black Shell Holder Color: Black Holds 5 Shotgun Shells Elastic Loops Holds Shotshells Securely
|
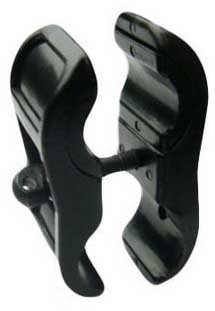 The Mako Group Shotgun Barrel Flashlight MountFeatures: Universal Barrel Design. Cleaver Removable Insert to fit most barrels. Great for Flashlights and Lasers. Complete with Sling Swivel Stud. Made from tough Glass-Nylon Composite.
|
 Nebo Products 5067 5067 Tactical Series Csi 8 Led FThe Nebo CSI Tactical Flashlight is the perfect flashlight! With an anodized aircraft grade aluminum construction; this flashlights design is water-resistant. Adding to the toughness is the aggressive self-defense face and anti roll body design. This flashlight features 8 White LEDs and a red laser…
|
One of the downsides to employing a shotgun for home protection is the perceived lack of storage options. If you have kids in the house, leaving a long gun unattended in the corner of your bedroom is an invitation for front-page tragedy. Locking it in a gun safe, particularly one in your basement, or out of immediate arm’s reach, is impractically inaccessible. Most bedside gun safe solutions cater to handgun storage; I love handguns–I have one locked in an electronic safe next to the bed for backup–but as I’ve been harping, defensive shotgunning is my bread and butter.
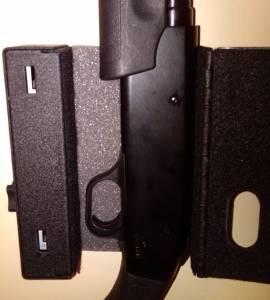 You can throw a long gun in a wall safe, but with exception of the V-line closet vault (flirting with $500), accessibility is slowed by keyed entry, not to mention, you have to cut a hole in your wall. The solution I’ve come up with (actually, TruckVault came up with it) is a fantastic little system called the Shotlock, which I purchased for around $150.
Its features are covered in detail in a review I wrote a couple weeks ago, The Shotlock Shotgun Safe Solution. The gist is, it’s a simple, rather brilliant steel trap that mounts directly to your drywall, and keeps your shotgun (pump, semi-auto, or over-under) locked up from unauthorized access. Where the design really shines is its mechanical five-button combo lock, enabling split-second access to your weapon. I mounted mine behind the bedroom door–it’s out-of-sight during the day while the door is open, and easily within reach after dark, when the door is closed.
The Shotlock is precisely what I’ve been looking for. Any other shotgunners out there concerned with milking maximum effectiveness from their home defense solution should definitely pick one up for themselves.
I’m going to take a break from expanding my home defense project for now; mainly due to a near-exhausted budget, and carpal tunnel from typing up this report. While I feel I’ve reached a pretty good resting point, I have full intentions to continuously upgrade my castle defense system, hopefully one day the reaching fire-farting lumberjack status I so long for.
I’ll be sure to keep you posted every step of the way. Thanks for reading.
Stay Safe!

Jack-
Monster post! I especially loved the opening comments about the home invasions. I raise my glass to your description!
Thanks for posting the YouTube video of the window film. I have heard of this before, but that is unbelievable. I have several doors with full glass that make me very nervous. I have one that has 9 small panes of glass that could easily be punched out, insert hand and unlock.
So let me understand the math on the cost. Is it about $90 per window (for a 5’x3′ window)?
Thanks a lot Scott!
Yeh, that YouTube video is tight – convinced me to buy the stuff (even though I’m sure I didn’t do half as good of a job installing it). Your math sounds about right, considering the stuff I bought, however, if you’re thinking about doing a whole house full of 5′ x 3′ windows (what a fun day that will be), you can probably catch a much better price break buying a bulk roll. Amazon, which is where I bought mine, is selling 60″ x 300″ rolls for $432.99:
http://tinyurl.com/4ypjhf5
One of these days, I’m going to do my whole house, and when I do, I’ll be sure to cover all the blood, sweat and tears involved on this site. If you do the same, I’d love to hear how it goes.
BTW, nice site, man – I know a good TKA student when I see one 😉
You’ve left out one of the best attributes of the pump action for home security. The universally recognized “CHK-CHK” that resonated from the weapon when a shell is chambered. It alone can deter an intruder who does’t want to be in the paper with you tomorrow morning.
Frank freakin’ Castle, to what do I owe this fine pleasure?
Of course, the “CHK-CHK” – it jumps right off the page. A round cycling through a pump action shotgun is indeed unmistakable, and would likely brown up the back of most bad guys’ pants.
I also think just hearing a gun in general–the slide of a 1911 or a Kalashnikov mag clicking into place–are deterrents in their own right…not as much of a deterrent as bang-bang, boom-boom, or “Dolemite is my name, and #$%$in’ up motha$#$%as is my game!”, but you bring up an excellent point.
Thanks for stoppin’ by, Frank. Keep punishin’!
As an English guy I’m just drooling over all these guns I can’t legally own!
Brett,
Sorry brother. If you’ll notice though, I covered firearms at the end, and I did it for a reason; if you have the rest of your security solution in place, chances are exponentially better that you won’t need to use lethal force at all…everybody wins.
If it’s any consolation, you guys have better beer than us.
Thanks for the comment!