If the proverbial poop hits the fan, and you only have ten minutes to get your family out of the house and on the move, will you be prepared to evacuate? Just to clarify, I’m not talking about turning your house into a self-contained fortress to live in until the fallout subsides – I’m talking about a scenario where you must leave everything, continue moving, and focus on keeping yourself and your family alive.
Many place too much clout in strategies that involve depending on the use of their cars for grab and go survival. If things get hairy enough, you may not have the luxury of an automobile. That said, packing light, and keeping only the bare essentials may be the only concern you can afford to have.
This article covers the emergency backpack supplies that you’ll need to give yourself the best odds of surviving an disastrous situation. Virtually every item mentioned is something that you can fit into one compact backpack. Any perishable items on this list have a minimum of five years, so it doesn’t hurt to start preparing early. Even packing for a vacation is a pain in the butt, so give yourself some peace of mind, and finish packing for Hell on Earth today.
Contents:
Pre-assembled emergency backpack kits
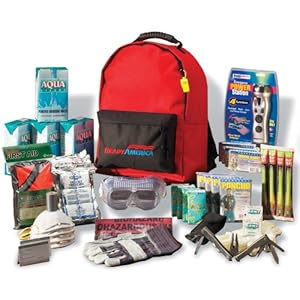 I suggest a lot of different evacuation supplies in this article. Although most of the supplies is very inexpensive, it adds up quickly. Not to mention, unless you already have a lot of the equipment, it’s a chore to assemble everything. If you’re serious about adequate disaster preparedness, and you want to save some money by purchasing in bulk, I suggest picking up a pre-assembled evacuation kit.
If you go this route, and want to give your family a solid three day advantage, be prepared to spend anywhere from $75 to $250. Purchasing everything on this list could quickly add up past the latter, so opting for a pre-packaged unit is often the best option. If you throw down a couple hundred bucks on one of these kits, and five years from now, when all the food is about to expire, you can still use it by throwing a huge “We Didn’t Have an Apocalyptic Disaster Party” with all your gear (kegs are generally sold separately).
 You need to be prepared to pack up your bare essentials and get on your way. Local disasters and mass evacuations will not grant you the luxury of staying forever in your fortified dwelling. That said, a good survival backpack is an absolute must.
Choose one that’s logically compartmentalized. In a pinch, there’s no substitute for organization and quick accessibility. Look for a backpack with two or three primary compartments. Some mesh lined pockets on the outside are a plus for fast access. Ideally, you’ll also want to look for a backpack with a self-contained hydration system in the top compartment.
Durability and comfort must also be a priority. A substantial, but inexpensive solution is a heavy duty polyester backpack. This material is lightweight, weather resistant, and you won’t go broke picking the right one. For the sake of comfort, choose a backpack with a good waist strap. That added reinforcement makes a world of difference during a long trek – It’ll save ya from a backiatomy.
The Everest 8045DLX is a solid pack for our purposes. It’s relatively inexpensive, and in the vain of grab-n-go disaster survival, it’s about all you’ll need.
 High-calorie food bars
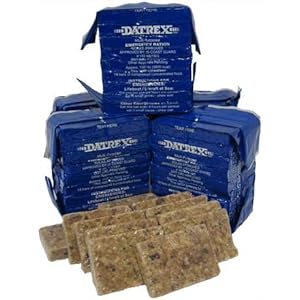
  – These are most often found in the 1200, 2400, and 3600 calorie varieties. Rationing just one 3600 calorie bar can provide enough nutritional value to keep an averaged sized man going strong (conservatively) for four days.
They require no preparation, short of opening a sealed package. They are made with only natural ingredients, and their lack of preservatives will help keep your thirst at bay and your water supply stretched. The bars are packaged in pre-cut tablets, for easy rationing. And finally, this US Coast Guard approved meal is safe to eat for five years, so stock up now, and be prepared for the worst in ’15. Datrex is the leader in the high-calorie food bar industry – I’ve sampled their bars and they don’t taste too horrible.
MRE Se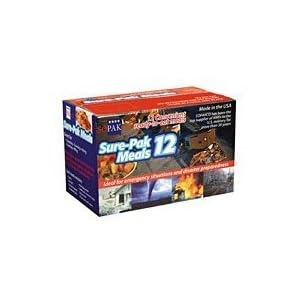 lf-Heating Meals
  – If you’re traveling with picky children, or just need a little more variety than high calorie food bars have to offer, you should pack your bag with a few MREs.
These “Meals Ready to Eat” are a US military favorite that come in a slew of different varieties. One product, “The Ultimate Self-Heating MRE” is packed with an entree of your choice, a side, a dessert, a snack, a flavored drink, and condiments all in one light-weight, durable container.
The containers are made from aluminum lined polyethylene, preserving them for up to 10 years. And although they’re perfectly safe to eat cold, the self contained heaters only require a tablespoon of water to activate, serving up a fine warm meal.
You definitely save the most on MREs when you buy them in bulk. Save yourself a few bucks and buy by the dozen.
 4.227 oz Water Pouches
  – You’re probably asking yourself, “Who would package water in such a ridiculously random amount?”. The truth is, there’s nothing random about 4.227 ounces at all. The Red Cross has determined that the average meal during an emergency situation requires 4.227 ounces of water to properly digest.
Rather than playing guessing games, carrying a nice supply of these pouches makes it much easier to efficiently ration your water supply. Personally, I prefer a pint of dark beer with my dinner, but in a survival situation, these water pouches will give you just the right amount you need. They have a shelf life of five years.
 Collapsible Water Container
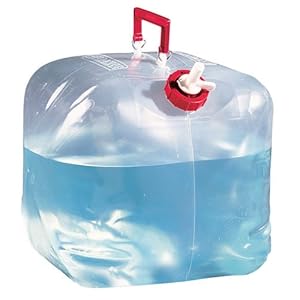
  – Don’t doom yourself by missing an opportunity to refill your water supply. The Red Cross deems 2.5 gallons of water an adequate amount to keep you plenty hydrated for a day spent in even the worst of Earth’s nasty climates.
Regardless of the brand you choose, ensure that your container is made from heavy polyethylene. This material warrants excellent flexibility for storage while not in use, and provides great durability to prevent leaks and punctures. Polyethylene can withstand extreme temperatures, so don’t be afraid to fill it with ice – water comes in all shapes and sizes – just make sure the opening is large enough to pack those ice chunks.
 Water Purification Tablets
  – Don’t go out like a chump. If the water you’re about to sip looks questionable, don’t chance it. Harmful bacteria, viruses, and protozoa like giardia iamblia won’t end your survival stint with these easy-to-use purification tablets. One small container of Potable Aqua tablets will typically give you enough clean water to fill up your new collapsible container three times.
 An emergency evacuation will leave you no time to go house hunting for shelter. What you need is something lightweight, durable, versatile, and easy to store while not in use. A tube tent fits the bill, and is another must have for any disaster preparedness kit.
For around the price of a Big Mac meal, you can pick up a tube tent with the capacity to shelter two people from the elements during an emergency. The model featured at the right weighs just over a pound, provides protection from moisture with its thick plastic material, and comes equipped with a cord, allowing you to stabilize it between two solid structures. Again, for just $5-10, you’re a cold, wet fool not to add one of these to your grab-n-go emergency backpack kit.
 Emergency Blanket
  – These blankets don’t look too warm, in fact, they altogether look pretty ridiculous. Thankfully, fashion doesn’t carry much clout in the world of disaster survival. For less than a dollar, you can store one of these life savers virtually anywhere – from your back pocket to your glove compartment – bust one of these suckers out to protect yourself from freezing to death. The baked potato aluminum foil look is a deliberate feature designed to reflect over 90% of your body heat in an emergency situation. Shell out a buck or two and add these to your disaster preparedness kit – you’ll be glad you did when you don’t die.
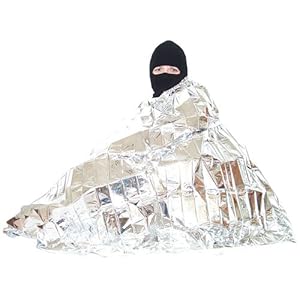 Emergency Sleeping Bag
  – These sleeping bags use the same radiant heat reflecting technology as the blankets. Put one of these on to keep your body warm while you snuggle up together with your honey, holding each other for dear life under the comfort of your $5.00 tube tent. All joking aside, these incredibly compact sleeping bags are made to cover all sizes from head to toe during an emergency situation. Being quite inexpensive, they’re a worthy investment.
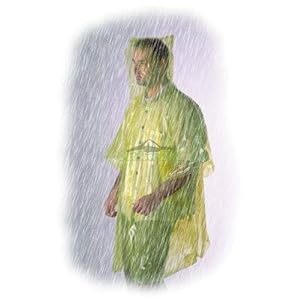 Emergency Ponchos
  – I don’t care how much body heat you’re reflecting under that sleeping bag, having wet clothes is horribly uncomfortable and potentially dangerous. You never know when it may be time to move – Packing an emergency poncho with your survival kit is the best, and cheapest way to keep your clothes dry, and your body safe during harsh conditions. You can pick up this stylish piece of survival apparel for under a buck.
 Handwarmers
  – At 135 degrees, disposable handwarmers provide an instant, close contact heat source. Grabber handwarmers break down to less than a dollar/piece, and provide up to eight hours of warmth that you’ll be thankful you have. To activate them, simply open the packaging. If you don’t need them for the full eight hours, simply seal them back up in an airtight bag, and save the remainder for later.
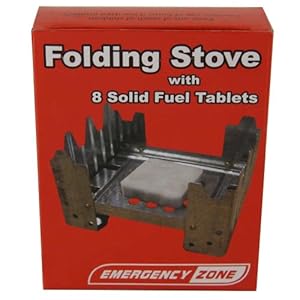 Flat Fold Stove
  – For around $9.00, you can pick up a portable flat fold stove, which can be easily stowed in your emergency prepared backpack. These stoves come with two dozen fuel tablets, giving you the ability to heat yourself and those around you, or cook up a delicious meal. The easy to light, clean burning fuel tabs are able to heat up a liter of water in 8 minutes. Flat fold stoves are an easy to use, integral addition to any survival kit.
 Waterproof Matches
  – Waterproof matches are essential to emergency backpacks from all walks of life. Even if you fail to heed my aforementioned advice, and travel without a poncho, you can use your soaked box of waterproof matches to fire up your flat fold stove and warm yourself up again. These matches are able to light after being totally submerged – you could go noodling for catfish, and still be able to start a fire. A box of fifty will put a three-quarter dent in your piggy bank. These are a no-brainer.
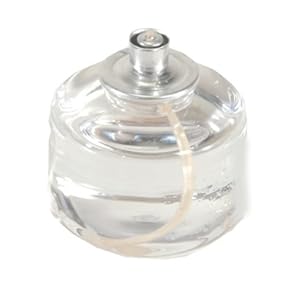 Emergency Candles
  – You may not always have the benefit of an electric powered lantern – a candle is a perfect powerless, inexpensive and lightweight alternative. I won’t insult you by explaining what a candle does, but I can recommend one that should be a part of any respectable evacuation kit; the 115-hour ReadyCandle burns for [you guessed it] up to 115 hours on odorless, clean burning liquid paraffin. They’re made with a simple snap-on cap, so you won’t have a huge mess on your hands when you inevitably knock it over. You better getcha one.
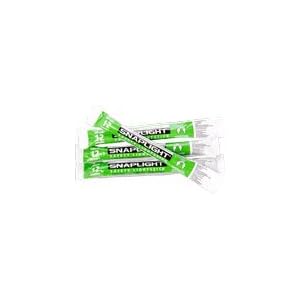 Lightsticks
  – Also great for woodland raves, emergency lightsticks will keep your vision going for 12 hours when power or flames aren’t an option. Simply snap them to turn on the florescent light. For $1.49/piece, you’ll never have more fun being stranded in the wilderness – kids love em too!
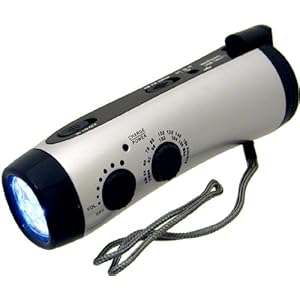 Flashlight
  – If you’re lucky enough to have one (which you will be if you prepare properly), nothing beats a flashlight for staying alive in the dark, and telling wicked ghost stories to evacuees who are already scared out of their minds. Although they come in many different flavors, there are a few key features you’ll want to consider when choosing the right flashlight to add to your backpack.
First, consider the size. Having a 5 million candlepower spotlight on hand would certainly have its advantages, but it will leave you little room in your backpack for the rest of your emergency supplies. You’d be surprised what kind of power you can get out of a compact flashlight without breaking the bank.
Another thing you want to look for is power efficiency. I recommend flashlights equipped with LED lights. They’re bright, compact, easy on your batteries, and have a long bulb life. Some even operate on kinetic energy – simply shake your flashlight to recharge the batteries.
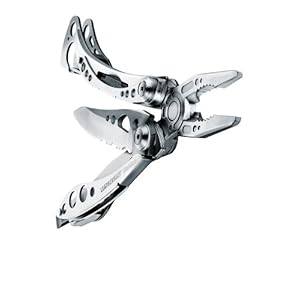 You can’t eat them, and they won’t keep you warm, but preparing your survival kit with the proper tools is as equally important as your emergency blanket or high calorie food bar.
You may be sick of reading about my lightweight, durable, and versatile theme throughout this guide, but choosing the right tools for disaster preparation is no exception. I strongly recommend you pack at least something with similar functionality as the following items. These items, all small enough to squeeze into your backpack, may be essential to your survival.
- All In One Survival Aid – A compact rescue package, typically found in the 5-in-1 and 7-in-1 varieties. The key features to look for are a signal whistle, liquid compass, signal mirror, fire starter flint, and match compartment.
- Rope – Specifically Nylon rope. Nylon is a very strong, weather resistant material that you can count on when you need it. 50′ should be an adequate length to work with for most jobs and obstacles.
- Swiss Army Knife – Get yourself a compact 12-in-1 system. The Swiss Army knife’s notorious reputation for practicality makes it a staple in your disaster preparedness kit. Although I carry the Swiss Army brand, you can find a decent knock off to add to your kit for under $4.00.
- Duct Tape – Anyone who’s ever used duct tape (that’s everyone) knows that I don’t need to justify this recommendation. You don’t need enough to stick your friend to the wall – 10 yards should do it.
- Leatherman – Packed ripe with survival handiness, a 20 function Leatherman will provide you with one potentially crucial tool that your typical Swiss Army Knife won’t – pliers. A brand name Leatherman is great, but you can find a good cheap one for less than $10.00.
- Folding Shovel – There’s no replacement for the versatility of a compact shovel. Among its many uses, you can use it to dig fire pits, shelter, rerouting the path of water from your tube tent, finding water underground, disposing of your MRE waste droppings…the list goes on.
- Leather Gloves – You may not think to pack a pair of gloves in your disaster readiness kit, but protective leather padded gloves are an inexpensive investment to keep your hands busy and your heart beating. Less than $3.00 will allow you work with your hands much longer, clearing obstructive debris, and preparing necessary shelter. Pack a pair for any able body in your crew.
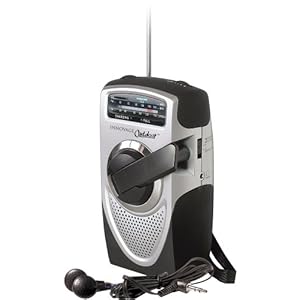 Regardless of the disaster, arguably the most important key to your survival is keeping yourself updated on the latest information. No simpler means meets this necessity than equipping your emergency kit with an AM/FM radio.
Because it may be quite difficult to determine how long you’ll be stuck in your predicament, having a redundant power supply for your radio is ideal. Popular portable radio power sources, other than batteries and AC, include handcrank and solar energy. This model ergonomically packs all four power features, almost guaranteeing that your radio won’t die. Let’s hope that you have similar luck.
A handy bonus feature that you may want to consider, also included in the Dynamo model mentioned above, is a radio/flashlight combo. With this, you get the blessing of having an extra flashlight on hand, and the priceless nostalgia of your middle school days, camping in your parents’ backyard, looking at dirty magazines and listening to Nirvana’s latest album.
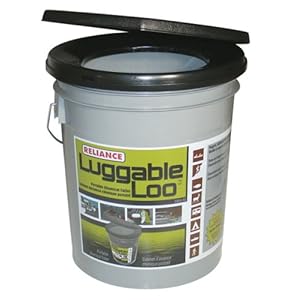 I’m not suggesting that you labor in front of your signal mirror to get your hair just right, but a basic sanitation kit will significantly increase your odds of preventing disease and infection while on your little adventure. Sanitation kits come in a wide variety, many even including luxuries like buckets for waste purposes. However, during an evacuation, it may be advantageous to not be carrying around a bucket full of your feces. Using a compact folding shovel, which we’ll discuss later, you can dig yourself a nice dirt bucket.
When packing your hygiene/sanitation supplies for your evacuation kit, keep it simple. We’re talking a toothbrush, toothpaste, a bar of soap, small container of hand sanitizer, a garbage bag, and a package of tissues. For you pretty boys, you might want to even consider throwing in a comb, a razor, and a sheet or two of toilet paper.
It doesn’t sound like a lot – that’s because it isn’t. You aren’t going to the prom, you’re on the move, living on bare essentials until you find a more substantial living arrangement…then you can crap in that bucket all you want!
 You’re not prepared for disaster evacuation if you haven’t packed a solid first aid kit. First aid kits usually range from 30-300 piece collections of simple, but essential medical supplies. For our intents and purposes, I suggest you pack a kit somewhere in the range of 75-100 pieces. You can pick up an 81-piece here for under $10.00.
I won’t detail every first aid piece you’ll need for thorough disaster preparedness, but the following are some of the staple supplies you’ll want to make sure you have when you buy your emergency backpack:
- The Right Case – This may be a no-brainer, but make sure you buy a kit enclosure that makes sense. For instance, the kit mentioned above gives you the option of a hard or a soft case. I think that the durable soft case is the best option for grab-n-go evacuation, as you’ll likely be packing this into a very snug backpack.
- Bandages – Just make sure you have plenty of bandages, ranging in a wide assortment of sizes and shapes, appropriately made to fit whatever wound you wind up with…you dumb klutz.
- Antiseptics and Pain Medicine – Pretty simple – pack cleansing wipes, healing ointment, aspirin, and ibuprofen to clean the wound and keep the pain at bay.
- Supplies For More Serious Injuries – Include trauma pads, gauze, first aid tape, and finger splints to keep yourself alive until you find more helpful help.
- Reference Material – None of this stuff is going to do you any good if you don’t know how to use it. Unless you’re a medical professional, I suggest finding a kit that includes a first aid guide. Also, at least skim it over when you get it. It’s always easier for me to learn new material when I’m not broken and bloodied.
I wrote this guide on putting together an emergency backpack about a year ago for a site I never got around to building. It’s not directly gun safe related, but a safe is a pretty good place to store your disaster preparedness kit anyway – grab your supplies while you grab your guns. Besides, this sucker is like 3500 words long, and took me a while to write – I’d hate to just let it rot in cyber Hell.

 Follow

Thank you, the emergency backpack article has invaluable info for a beginner who has to learn fast
Thanks! I’m glad you got something out of it. I’m open to suggestions – if you guys can think of something else I may have left out, let me know.
Thanks again
Thank you – excellent article- where in South Africa can one get these goods?!
While I’m not very familiar with regionally local shopping in South Africa, my personal collection comes from a mix of stuff I already had, most of the tools and the camping gear I got from a sporting good store (here in The States I go to Dick’s – even though it sounds rather suggestive ;)), and, of course, if you’ll notice the links in the article, I bought most of the hard-to-find stuff off of Amazon.com.
I did a little research and found that on most products, it looks like they’ll ship to South Africa. This looks like a pretty decent article to tell you how to do it:
http://www.amazonsouthafrica.co.za/amazon-delivery-to-southafrica.html
Good luck, and thanks a lot for reading!
Have you seen the latest hard-knuckle tactical gloves? They’re miles above the old styles made with polycarbonate plastic.
They don’t really have much to do with prepping an emergency backpack, but yeh, SAP gloves are tight. I have a pair of black leather ones with 1/2 lb of shot lining each set of knuckles — fantastically nasty. Take care.
Jack,
If you are in a hurry preparing an EOTWAWKI (end of the world as we know it) pack, like, while the sky is falling, you can grab your old pair of BDU pants and make a sling pack. Tie the legs together with some parachute cord and stuff it full of your necessities, then cinch the waist shut. Slip it over your head and arm and haul ass to high ground. The external cargo pockets are great for things you might need in a hurry, like toilet paper after you drink some questionable water, and your favorite pistol if you run into Charlie in the jungle. Best part is, they are already camouflage. If you put your hard items inside your soft items and roll them tight the pack wont beat you up too badly on a long trek, and your sleeping bag stuffed in last will make a nice seat, or a soft landing if you fall over backwards…
Ben – that’s freakin fantastic…simple and extremely practical. I’ll need to get a second pair of BDUs…
Could you expand on this article and include additional items? I’d like to read your thoughts on what kind of extra clothing you would recommend.
Good article.
Thanks.
Hey Mitch,
Thanks for the feedback. I would like to spruce up this list a little more, as you suggested, and perhaps I will…it’s kinda one of those things I keep putting off until “next week”. Anyway, concerning clothing, here are some brief suggestions, and they’re going to vary significantly depending on where you live, as well as the season…it may not be a bad idea to have a 3 or 4 season clothing rotation next to your bag of gear.
Keep a change of socks, underwear, and an under shirt. Layered clothing is a good idea, however, you want to be sure to wear comfortable, loose-fitting clothes to encourage blood and air flow. I’d recommend staying away from cotton for your socks, pants and shirt/sweater, and opting for wool instead. Wool is a bit easier on the skin, and it doesn’t dampen quite like cotton does. Depending on your climate, you may want to invest in a bottle of wool wax (lanolin oil) to throw on your socks and sweater. This helps create an extra moisture barrier.
You’re going to want a hat as well, not only for keeping your head warm, but the sun off of your face and neck as well. A bandana isn’t a bad idea either, as it can be used as a hat alternative as well as an ad hoc tool to keep dust and other foreign particles out of your mouth and eyes. It should go without saying, but a solid belt is a staple to any set of survival clothing – a “holster belt” is usually ideal, as they’re built to stay rigid under the weight of a loaded pistol, as well as anything else you want to hang off of it.
As far as shoes are concerned, I’d recommend a sturdy, worn-in pair of hiking boots. If you don’t already own a pair, head over to your local Army surplus store and see if they have a broken-in pair in your size. New kicks look nice, but you’re gonna be asking for blisters if you wear them on a long trek. Also, make sure they fit on those thick wool socks!
I know that’s a pretty light list, but hopefully it gives you a good idea of what you’re looking for. Let me know if you have any questions, or would like to add anything.
Thanks again!
Good thoughts!
I have been pondering the same sort of situation lately, and a lot of your ideas I’ll put to use.
OK with you if I pass on some of what I come up with?
My situation would involve the country and climate here on the south Oregon coast. Meaning, steep country and a butt-load of rain.
Thanks for the response.
Mitch
Every day I’m more convinced this country is going down the hill fast… At least knowledge from sites like this will help some learn and prepare. Thanks.